


Recipe and photos by Erica Gamboa
Homemade Flour Tortillas
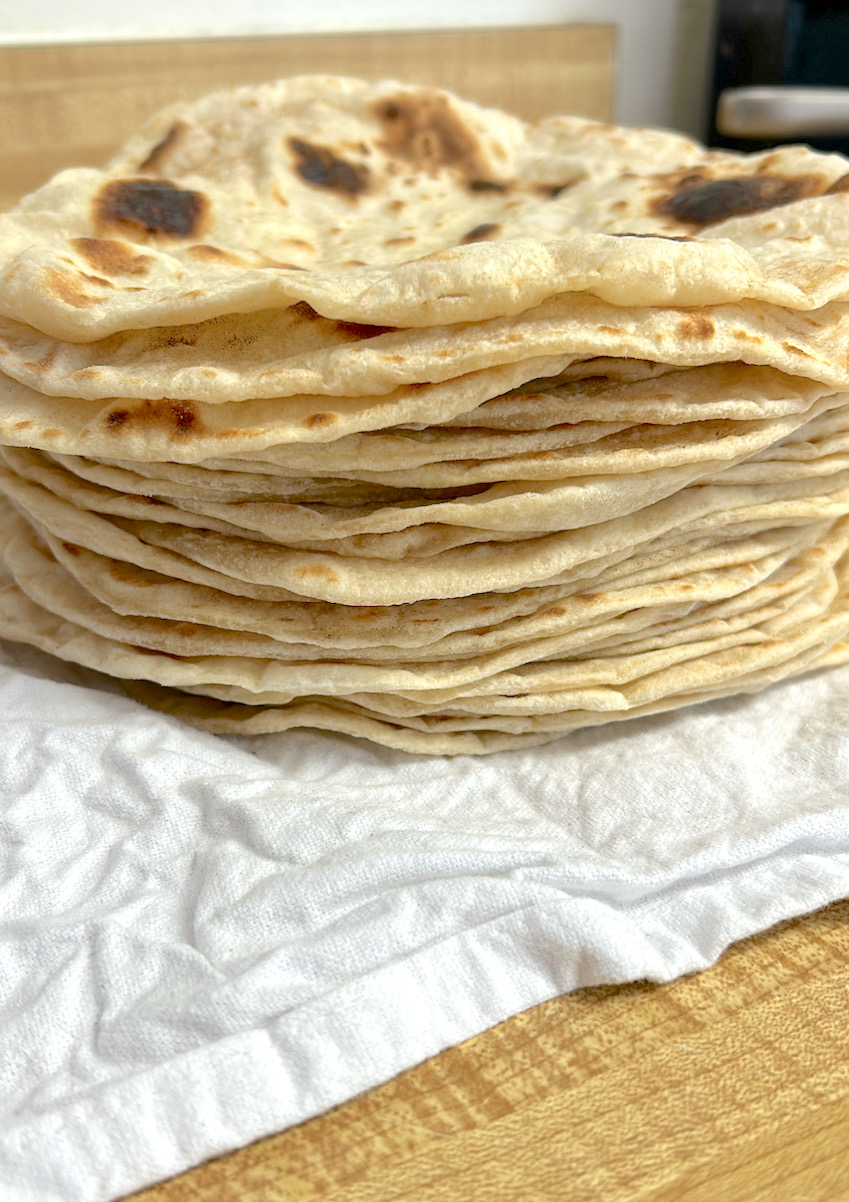
Homemade and hand-rolled flour tortillas are delicious and warm right off the comal (flat griddle). They are soft, slightly chewy, yet fluffy, and made with 5 simple ingredients. Enjoy them with your favorite Mexican dishes or simply with a good smear of salted butter; it’s truly heavenly and a very special treat. The essence of a traditional Mexican kitchen, the aroma that fills my home on a Saturday morning, is like a sweet kiss from my ancestors.
Yield: 4 dozen
PREP TIME: 10 minutes + KNEADING TIME: 10 minutes + RESTING TIME: 1 hour 15 minutes + COOK TIME: 1 minute = TOTAL TIME: 1 hour 36 minutes
Difficulty: Moderate
A Tribute to my Abuelita
My paternal grandmother, Abuelita Maria, was born in Sonora, Mexico, and she’s the reason I tried so hard to get my tortillas just right. Being of Sonorense decent, it is important to prepare homemade tortillas the right way because there is one thing that they are known for, and that’s the Sonora Style Tortilla.
Sonora Style Tortillas are very thin, soft, and slightly chewy, extra-large tortillas that are very distinctive of that region of Mexico. My abuelita carried that tradition with her through her life, and although she grew up in the state of Chihuahua, the tradition of making tortillas in general carried on.
These tortillas were handmade daily without fail and by the dozens in order to feed her nine children. It was a way of life and no big deal; they would grind their own coffee beans and make their own tortillas every day. The whole town did! Can you imagine the aromas that filled the air?
My father emphasizes this when he tells the stories of his childhood, and I’m instantly transported there with him. He lights up, and his whole demeanor changes. He’s suddenly a little boy again, walking the dirt-paved roads of the pueblo he grew up in. Going door to door, selling eggs freshly harvested from their chicken coop.
He grew up with very little; it was rough for them, but by no means was he poor. He was rich, rich with experiences of a childhood that doesn’t exist anymore, at least not for us. A simple and humble upbringing sometimes sparked by the excitement of making a few extra pesos to buy a soda that he’d have to share with his siblings. But life was good, as good as it could get for them, and he talks about it like it was the best but also not the best sometimes.
I chose to pluck out the good, which led me to make these tortillas in the first place. I wanted to give my dad a little taste of his childhood. What started for me as a challenge has now become something I can do with ease—no measurements, just the feel of the dough—and I know it’s just right. It took me 6 years of recipe testing, practicing, and lots of mistakes, but I didn’t give up. I am so glad I didn’t. I’m confident and relaxed now, and I enjoy every second I spend in the kitchen making them for my family. What was once an edible gift I’d make my dad for birthdays or special occasions has now become something I do often.
Saturday Mornings in the Kitchen
I love my early Saturday mornings in the kitchen at 6 a.m., sipping on my cafesito and the Food Network on the TV in the living room. My husband on the sofa, drinking his coffee and sneaking off with tortillas fresh off the comal, it’s pure joy. The girls waking up to the aromas of fresh tortillas and fresh made salsa made on the Molcajete. They always walk in the kitchen and say, “You’re making tortillas for Grandpa?” They just know that these are his tortillas. This is his recipe; it will belong to him forever.
My heart, my soul, and everything I have go into kneading, stretching, rolling, and perfecting them. It’s a token of my love, and that’s what makes homemade cooking so special. It’s an expression of love through the labor of your hands. A delicious and simple gift that has so much power to spark a memory and the nostalgia that our souls need to connect us to the ones we’ve loved and lost. Money can’t buy a gift this precious.
Imitated but Never Duplicated
There is always room for improvement, and I know I’ll never get them just like his mother did; a mother’s cooking can be imitated but never duplicated. I am honored to share my recipe and technique with you. There is really nothing to it, but it does take practice and patience, so please don’t give up!
You may get saltine crackers or tortillas the shape of Texas the first few times, like I did, but stick to it. It’s a labor of love and a gift that you will be able to pass down for generations to come. I hope that you will roll up your sleeves and give it a try. You will never want to go back to store-bought packaged tortillas again.
Happy eating, from my little kitchen to yours.
Homemade Flour Tortillas Video
Preparing the Tortilla Dough Ahead of Time
Making tortillas can feel difficult and labor-some, but that comes with the territory of making good things; they take time and a little work. One of the ways that I have made the process easier for myself is by prepping my dough in advance. I have made tortillas to feed 14 people for breakfast, all while cooking the entire breakfast as well. It is no easy task. So I decided to try and prepare the dough and make the dough balls the night before, so the morning of, all I had to do was roll them out and cook them.
I know, you’re probably thinking, why didn’t I just cook them the night before? Well, it’s pretty obvious! The aroma that fills the house in the morning and the impression it makes on your guests is very special. Cutting out that extra hour and a half of prep the day-of makes a big difference.
Simply follow the steps for preparation and place the dough balls in an airtight container in the refrigerator overnight. Take them out of the refrigerator a few hours before and bring them to room temperature before rolling them out.
Homemade Flour Tortillas
BY ERICA GAMBOA

Homemade and hand-rolled flour tortillas are delicious and warm right off the comal (flat griddle). They are soft, slightly chewy, yet fluffy, and made with 5 simple ingredients. Enjoy them with your favorite Mexican dishes or simply with a good smear of salted butter; it’s truly heavenly and a very special treat. The essence of a traditional Mexican kitchen, the aroma that fills my home on a Saturday morning, is like a sweet kiss from my ancestors.
YIELD: 4 DOZEN | Difficulty: Moderate
PREP TIME: 10 minutes + KNEADING TIME: 10 minutes + RESTING TIME: 1 hour 15 minutes + COOK TIME: 1 minute = TOTAL TIME: 1 hour 36 minutes
Ingredients:
SHOP RECIPE INGREDIENTS FOR HOME DELIVERY
- 8 cups all purpose flour, plus extra for dusting
- 1 liter of warm to hot water (about 4 cups)
- 1 tbsp plus 1 tsp of salt
- 1 1/4 cups vegetable shortening, plus extra for kneading
- 1 tsp baking powder
Directions:
Mix the dry ingredients:
In a large mixing bowl, take the flour, salt, and baking powder and mix with your hands until well combined.
Add the fat:
- Take the shortening and add to the flour.
- Using your hands cut the shortening into the flour by squeezing your hands together until you form a crumb like consistency similar to when making a pie crust. Make sure to break up every large lump of shortening.
Add the water:
- The water should be as hot as your hands can stand. *Make sure to check the water temperature before adding it to the flour mixture to avoid getting burned. I warm the water on the stove and shut it off as soon as I see it starting to come to a boil. I let it sit for a bit until it is manageable for my hands.
- Make a well in the center of the flour and begin to add the water to the flour a little a a time. Start with one cup.
- Begin to mix the flour and water by hand if it’s tolerable or with a spatula until the flour reaches a temperature you can handle.
- When the first cup of water is incorporated, repeat this process by adding a cup of water at a time until the dough comes together and is hydrated. It should be slightly tacky and sticky. Be sure not to add too much water. You should only add enough water until it is well incorporated into the dough and the dough pulls away from the side of the bowl easily. *Depending on the type of flour used, the amount of water needed should range between 3 1/2 to 4 cups.
Kneading the dough:
- Remove the dough from the bowl and place it on a clean, dry, and flat surface.
- Knead the dough by pulling, stretching, folding, and bringing it back together in a ball. Repeat this process for about 10 minutes. [It takes arm work but it is essential for making sure the tortillas are pliable and thin.] If you do not knead the dough enough, the texture of the tortilla will be too doughy and bread like.
First rest:
- Once the dough is kneaded, take the dough and place it back into the bowl.
- Take a small amount of shortening or vegetable oil in your hands and rub the top of the dough well to ensure the dough does not dry out while it’s resting.
- Cover the dough with a piece of plastic wrap and place a towel over the bowl.
- Let it rest on the counter for 45 minutes.
Forming the dough balls:
- After 45 minutes of resting, the dough should have expanded a little and relaxed. Take the dough out of the bowl and place it on the working surface again.
- Take your hand and squeeze the dough between your index and thumb forming a ball.
- Roll the dough in the palm of your hand or on the work surface to form a uniform round ball and set aside.
- Cover with a sheet of plastic wrap and repeat the process until you have formed all the dough balls.
- This recipe should yield approximately 4 dozen dough balls about 2 inches in size.
Second rest:
Let the dough rest covered with plastic wrap for 30 more minutes.
Preheat the comal or skillet:
- Preheat the skillet or comal over a low flame during the final 10 minutes of the dough’s second rest.
- Once you’re ready to roll out the first tortilla, turn up the heat to medium high. Make adjustments to the heat as needed.
Rolling out the tortillas:
- Dust the work surface with the extra flour.
- Dust the dough ball in the flour as well. *I make a small mound of flour off to the side for dusting.
- Gently press your fingers on the ball to slightly flatten it.
- Take a rolling pin and roll the tortilla once, back and forth.
- Turn the tortilla counter clockwise and repeat about 4 times.
- Hold the tortilla in your hands and gently stretch the dough to maintain its circular shape until it becomes thin and almost transparent.
- You will feel the dough getting thinner and thinner, but be careful not to tear it.
Cooking the tortillas:
- The skillet or comal should be nice and hot at this point, make an adjustment to the heat if needed.
- Place the tortilla on the comal.
- Instantly you will see air bubbles start to form.
- Wait about 20 seconds give the tortilla one counter clockwise turn and cook for another 10 seconds.
- Flip the tortilla once, cook for 30 seconds and remove from heat.
- Place on a dish towel and cover while you repeat the process.
*Adjust the heat on the skillet or comal if necessary. It should be hot but not burning the tortillas. You will have to use your judgment and make adjustments.
Enjoy immediately or when they are all cooked; there is no right or wrong way to enjoy these tortillas.
Tips
Using Alternative Fats
A fat of some sort is always needed to ensure a tortilla has the proper flexibility and softness. I would advise against skipping this because you will not have the best result.
However, there are many different variations of “fat” that can be used. Below are some of the substitutions you can make to fit your lifestyle and preferences.
- Lard / Manteca – Pork fat, chicken fat, goose fat or duck fat
- Tallow – Beef fat
- Butter flavored vegetable shortening
- Butter, salted or unsalted
- Heavy Cream
- Whole Milk
- Buttermilk
Notes:
Storing the tortillas
Storing left-over tortillas is easy and a reward for all of your hard work. The thought of having homemade flour tortillas for days to come is an incentive to make as many as your hands can roll. These are stored easily in a plastic zip-lock bag for about one week. I have never had any tortillas left over from one week; I can’t vouch that they keep for any longer than that, and I’m pretty sure they will not last in your home either.
Freezing
I do not recommend freezing the tortillas. As I have said many times before, some things are meant to be enjoyed in the moment and not left for later.
Be sure to lay the freshly made tortillas out on a clean kitchen towel separately to make sure they are completely cooled before storing them in the plastic zip-lock bag.
Nutrition Facts Per Serving
Calories per serving: 123
Servings: 48 tortillas


About Erica
Erica Gamboa is a passionate home cook, wife, and mother of three. Cooking since she was 13 years old she…
Recent Stories
- Kal Penn and John Cho Star in Toyota’s New EV Ads

- Empowering Girls Through Dove’s ‘The Game Is Ours’ Campaign

- VOTE: Your Voice Counts

- Toyota’s Lost & Found Challenge: A Fun Interactive Experience

- K-Love Fan Awards 2026: The Complete Winners List (Live Updates)

- Rising Country Star Samantha Rae Continues Her Climb in 2026

- 52nd American Music Awards Red Carpet Highlights

- Toyota Brings Forza Horizon 6’s Barn Finds to Life With an Immersive Pop-up Experience to Los Angeles

- Ferrara’s Brach’s Crunchy Chewy Jelly Beans Earn Top Seasonal Innovation Honor at 2026 Sweets & Snacks Expo

- Hollywood PAL Car Show and Block Party Draws Crowd and Supports Youth Programs

Subscribe to: HB | Hollywood Beat magazine
ADVERTISEMENT
SHOP RECIPE INGREDIENTS FOR HOME DELIVERY
Did you make this Homemade Flour Tortillas recipe?
Share it on Instagram.
Tag @hollywoodbeatmagazine on Instagram and hashtag it #hollywoodbeatmagazine
You May Also Enjoy
Are you following HB | Hollywood Beat magazine on Instagram? Follow to receive notifications of all the great content we have to offer.
Subscribe to: HB | Hollywood Beat magazine
Leave a Reply