Recipe, video, and photos by Erica Gamboa
This post includes affiliate links. If you make a purchase through a link on our website, Hollywood Beat magazine may receive an affiliate commission.
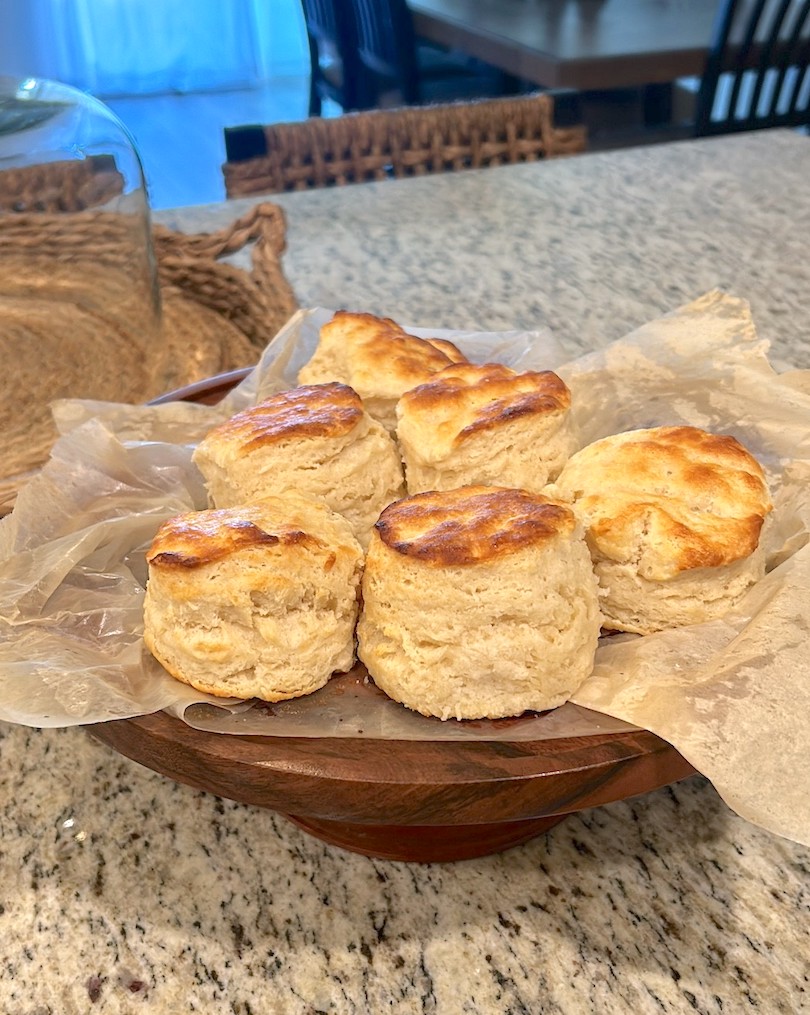
Buttermilk Biscuits
Warm, buttery, and tender biscuits made with buttermilk and butter. Baked with nuggets of butter in between layers and layers of soft, pillowy dough. They are melt in your mouth delicious and are a great addition to your breakfast or dinner table.
Servings: 8 to 10 – 2” biscuits
PREP TIME: 20 minutes + COOK TIME: 18 to 20 minutes = TOTAL TIME: 40 minutes
Difficulty: Easy
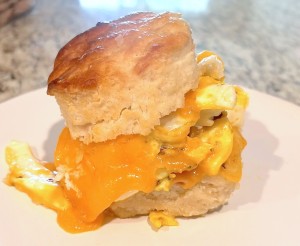
Kids and their cravings—most of the recipes I come up with are based on what my kids ask for. Every day, it’s something different that someone in the house is craving. Luckily for them, I love to cook, and I’m up for most of their outrageous requests; it keeps me on my toes and keeps my brain in creative mode. On this day, my middle child, Hailey, was craving a biscuit. She loves breakfast sandwiches anytime of the day, and on this morning, she just didn’t settle for any ordinary breakfast sandwich; she wanted it on a homemade biscuit. Honestly, I had never made a biscuit! But here I go, making a homemade biscuit for her breakfast sandwich. The first try was a fail, but bless her heart, she loved her momma’s biscuits (hockey pucks) none the less. She ate her sandwich with such pleasure, and she was so upset when she found the rest of the biscuits in the trash. I owed her a redo!
So I kept at it for three days. After a few days of trial and error and trying different flours and techniques, I came up with a recipe that I was really happy with. It’s easy and comes together in 20 minutes, bakes for another 18 to 20 minutes, and you’ll have warm, buttery, and tender biscuits on your table in less than an hour. Yum!
The Criteria for a Good Biscuit
We’ve all had a biscuit at some point in our lives, and we know a good biscuit when we have one. The criteria for a good biscuit are: flaky but not dry; tender yet sturdy enough to hold up to whatever you put on it or in it; buttery and moist but still doughy. Just thinking about these biscuits makes my mouth water. This recipe is easy and versatile; you can make them sweet or savory with just a tweak of ingredients. They are just the most delicious little pillows of dough to serve with any meal, from breakfast to dinner and anything in between. I hope you’ll enjoy them as much as we did! Happy eating!
The Most Important Step to Making Biscuits
The most important step to making biscuits is making sure your ingredients are the coldest possible: milk, butter, and flour. I recommend placing the butter in the freezer for a few hours if possible, if you have time to plan ahead. Sometimes we just can’t plan ahead like this, so cold butter straight from the refrigerator will work fine. Room-temperature butter will NOT work; please do not attempt to use room-temperature butter unless you are buttering your biscuits straight from the oven. The milk or buttermilk should also be as cold as possible and refrigerated until right before you’re ready to use it.
Storing Flour in the Fridge
I have read a few recipes where even the flour is placed in the refrigerator, and I tried this myself as well as using flour straight from the pantry, and I got the same results. It definitely is a step that you can take if you have enough room in your fridge and have time to plan ahead. It will ensure that all of your ingredients are as chilled as possible and produce excellent biscuits.
Buttermilk Biscuits Quick Look Video
Buttermilk Biscuits
BY ERICA GAMBOA
Warm, buttery, and tender biscuits made with buttermilk and butter. Baked with nuggets of butter in between layers and layers of soft, pillowy dough. They are melt in your mouth delicious and are a great addition to your breakfast or dinner table.
Servings: 8 to 10 – 2” biscuits | Difficulty: Easy
PREP TIME: 20 minutes + COOK TIME: 18 to 20 minutes = TOTAL TIME: 40 minutes
Kitchen tools you will need:
• Box cheese grater or pastry cutter
• Straight-edge biscuit cutter, about 2”
• Baking sheet or cast iron pan
• Parchment paper
• Non stick spray or oil.
Ingredients:
- 2 1/4 cups AP flour, plus a little more for dusting.
- 2 tbsp baking powder
- 2 tsp sugar
- 1 tsp salt
- 1/2 cup unsalted butter (keep in the freezer until ready to use), plus 2 tbsp for melting at the end.
- 1 cup buttermilk (keep in the refrigerator until ready to use)
SHOP RECIPE INGREDIENTS FOR HOME DELIVERY
Directions:
- Preheat the oven to 425 degrees.
- In a large bowl, place the flour, baking powder, sugar, and salt and combine well.
- Take the butter out of the freezer and grate it with the box grater, or cut the butter into small pieces using the pastry cutter.
- Combine the butter into the flour using a spoon, evenly distributing the butter into the flour. Try to avoid using your hands for this part, as the heat from your hands will change the temperature of the butter. Incorporate the butter into the flour until the flour has a sandy consistency.
- Create a well in the center of the flour.
- Take the buttermilk out of the refrigerator and slowly add the buttermilk to the well in the center. Pour half to start.
- Using your hands, incorporate the buttermilk into the flour.
- Keep adding buttermilk and combining; repeat this step until you form a ball of dough. The dough should be a little tacky but not too sticky or wet. So only add enough buttermilk until you reach this consistency, always adding a little at a time. You can always add, but you can’t take away. This should take about 3/4 cup of buttermilk, depending on the humidity of the flour. Reserve the rest of the buttermilk for later.
- Once the dough reaches the right consistency, place it on a clean, lightly floured surface. Preferably the counter top.
- Gently pull together all of the loose bits of flour with the dough to form a cohesive ball.
- Very gently, with little pressure, pat the dough ball flat and spread it evenly, forming a”3/4″-thick rectangle. Make sure the surface you are working on is floured to avoid sticking. Add a light dusting of flour in between the next steps.
- Using floured hands, take one end of the dough and fold it onto the center, and then the other end as well.
- Turn the dough once counter-clockwise.
- Gently pat and flatten the dough, keeping the rectangular shape.
- Repeat these steps a total of 3 times.
- This step requires patience and a gentle hand. Take your time with the dough. Be gentle and try not to handle it too roughly; you want it to keep its soft and tender texture while you repeat these steps.
- For the final turn, flatten the dough enough so that it is about 3/4” thick.
- Take the biscuit cutter, dust the cutter with flour, and cut into the dough. Do not twist the biscuit cutter; this will seal the edges and not allow the biscuit to rise properly.
- Try to cut the biscuits out as closely as possible to get the most biscuits out of every batch.
- Gently re-roll the scraps of dough until all of the dough is used up.
- Take the cut-out biscuit onto your hand, giving the biscuit one flip so that the bottom side is now the top. Place the biscuits on the baking sheet or cast iron pan, making sure to keep them as close together as possible. Make sure they are touching so that the only way for them to expand is upward.
- *If using a baking sheet, place a piece of parchment paper on a baking sheet.
- *If using a cast iron pan, spray or brush the pan with nonstick spray or oil.
- Brush the tops of the biscuits with the remaining buttermilk.
- Bake for 18 to 20 minutes, or until golden brown on top.
- Remove from the oven and brush with 2 tbsp of melted butter.
- Serve warm or let cool completely before storing in an airtight container or plastic zip-lock bag.
*Biscuits will stay fresh and soft for about 4 to 5 days.
Notes & Suggestions:
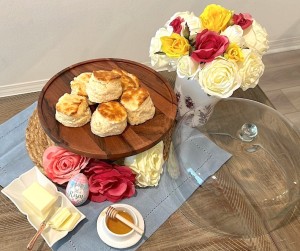
Tips for Serving
Honey Butter
For a sweet and delicious touch to these biscuits, try making honey butter to spread on top.
Take 2 tbsp of melted butter and 1 tbsp of honey and combine well. Brush the tops of the biscuits as soon as they come out of the oven.
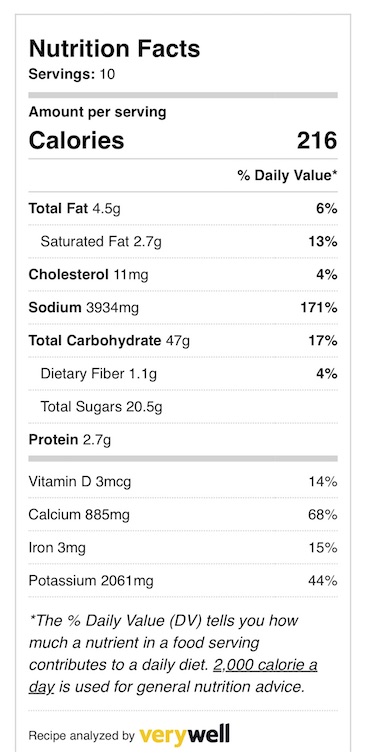
Nutrition Facts Per Serving
Calories per serving: 216
Servings: 8 to 10 – 2” biscuits

About Erica
Erica Gamboa is a passionate home cook, wife, and mother of three. Cooking since she was 13 years old she…
Recent Stories
- Selena Gomez is embarking on an exciting culinary journey in the brand new series Selena + Restaurant

- Cold Stone Creamery®’s Strawberry Passion(TM) Cake Will Make Mother’s Day Even More Delightful
- On April 26, MUSICARES® Will Host The Day That Music Cares

- Easy Egg Frittata

- Free Krispy Kreme Donuts Today, April 19

- Unleashing the Power of Women 50 and Over: QVC Paves the Way for a New Era of Opportunity

- The 2025 Screen Actors Guild Awards® Date Has Been Set

- Dodgers vs Nationals on Jackie Robinson Day

- The Los Angeles Dodgers’ Commitment to Preserving Jackie Robinson’s Legacy

- The Voice Knockout Rounds Premier Season 25

Subscribe to: HB | Hollywood Beat magazine
ADVERTISEMENT
SHOP RECIPE INGREDIENTS FOR HOME DELIVERY

Did you make this Buttermilk Biscuits recipe?
Share it on Instagram.
Tag @hollywoodbeatmagazine on Instagram and hashtag it #hollywoodbeatmagazine
You May Also Enjoy
Are you following HB | Hollywood Beat magazine on Instagram? Follow to receive notifications of all the great content we have to offer.
Subscribe to: HB | Hollywood Beat magazine

Leave a comment